Sunday, May 27, 2012

Happy Birthday to the Golden Gate Bridge


Five years ago My Guy was working in Mountain View, CA, and I got to visit him for Labor Day weekend.

We joined friends who rented a convertible and then spent the weekend traipsing the tourist spots of the Bay Area.

The trip was fun and amazing and educational and resulted in an impressive hangover coupled with the opportunity to snap several dozen photos of the Golden Gate bridge on a foggy afternoon ... from the front seat of a sports car ... topless.

The car, of course, not me.

Today this icon of the west and America and art deco turns 75 years old, so it seems the perfect opportunity to share two photos which I am particularly happy about. Crappy perspective, perhaps. Bad editing, for sure. Beautiful anyway.

Friday, May 25, 2012

CC2C No. 7: Brushless watercolor

Challenge: The StudioL3 Compendium of Curiosities volume II Challenge, technique 7

Technique: Brushless watercolor, page 49

Sponsor: Eclectic Paperie

Main products used for this project: Distress stain, paper stash retro grunge, rock candy distress stickles, ideaology numerals, and the mini paper rosettes die.

Project observations: After finishing the background that is made using the technique of the week I waved it around in My Guy's face and demanded he provide input.

In hopes of making me quickly move along, he said approvingly, "Neat. It looks like watercolor."

Isn't he the greatest guy ever? He always knows exactly what to say!

Anyhow, my actual point is this: The brushless watercolor technique is cool as hell! It's not very complicated and is useful for creating a background, as I've done, or for the focus of a piece of art. Just check out what Linda did with her brushless watercolor!

Thank you for checking out my art today, and I'm looking forward to seeing where brushless watercolor takes you!

12 Tags of 2012: May flowers

This month's 12 Tags, another in the series hosted by Tim Holtz, involves a lot of fun inking and gluing and grungy ideas, and something that has recently become my favorite technique: Paper flowers dipped in Ultra Thick Embossing Enamel.

The first time I saw this method was at The Funkie Junkie blog. Linda Coughlin, who owns the Funkie Junkie blog, Frilly and Funky challenge blog and stores on Etsy and Zibbet, used paper flowers cut with the Tattered Florals decorative strip die.

Today's version is from Tim of course and employs teeny paper flowers on wire.

I only had two itsy bitsy paper flowers on hand, but wanted three for my midnight garden, so I made a third with a bit of colored copper wire and plain printer paper cut in the style of kindergarten students making snowflakes -- it turned out beautifully, don't you think?

Another element that is unique enough to babble about are my homemade version of Tim's chitchat blocks. They're printed on buff-colored card stock, trimmed out and lightly crumpled. Using an alcohol-ink applicator tool that was dipped into a pool of Victorian Velvet Distress Stain I colored the edges of the blocks.

Ensuring that the tool was very wet with stain resulted in a wonderfully blotched and soiled-looking design perfect for a grungy garden sign.

Finally, since I'll be adding this to the link list at Frilly and Funkie's Sunday Share, let's look at what I used from the Funkie Junkie shop: Three rusted metal stars, a small piece of rusty tin mesh, ribbon (dyed with distress stain) and a manilla tag, cut with a die that also was purchased from Linda's store.

OK, I'm off to play with some brush less watercolor that is the topic of the week at StudioL3.

Thanks for visiting today and let me know if you have any questions!

Sunday, May 20, 2012

CC2C No. 6: Tissue wrap collage

Challenge: The StudioL3 Compendium of Curiosities volume II Challenge, technique 6

Technique: Tissue wrap collage, page 38 

Sponsor: The Funkie Junkie's Boutique

Main products used for this project: Paint dabber, tissue wrap terminology, archival ink, Ranger shrink plastic and alcohol inks (to color shrink plastic).

Project observations: Happy Sunday! The better part of my Saturday was spent with sticky, inky and grungy fingers because this tissue wrap technique is so much fun that I had to make a bunch of stuff!

The two best are shown here, and I'm excited to report that this technique has so inspired me that I'm going drop by friends' blogs then get back to the craft desk ... can't wait to play some more!

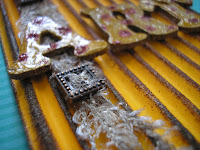
One more thing before I rush off: The corrugated card board piece is ATC sized (2 1/2 by 3 1/2) and the flower and leaf were cut from shrink plastic using Tim's tattered florals and leaves. Also, the background "stamping" on this piece is actually free-hand Sharpie drawing!

Enjoy the upcoming week everyone!

Tuesday, May 15, 2012

CC2C No. 5: Shattered stains

Challenge: The StudioL3 Compendium of Curiosities volume II Challenge, technique 5

Technique: Shattered stains, page 48 

Sponsor: Simon Says Stamp

Main products used for this project: Distress stain, rock candy crackle paint, grunge board and chip board.

Project observations: Our technique of the week calls for a product "like grunge board" and should maybe just go ahead with a firmer statement. For instance, "if you don't use grunge board this technique will work, but will surely drive you nuts trying to get it right fifty times before you just do what you were told in the first place."

That's awfully wordy though and not terribly friendly sounding. Definitely not in the style of our Grungy Guru Tim Holtz, or our Compendium Coach Linda at StudioL3.

Technique followers this week might want to go straight to the grunge board is all I'm saying.

Chip board came out for my initial attempt, and then a couple more, before I figured out that there's another word that our Tim uses which is imperative: Porous. Chip board, much of it anyway, has a sort of non-pourous finish. It'll let through a small amount of ... well, you need to get the book and check out the technique to understand fully. Trust me though that it's not what you want to use, at least at first.

On the other hand, if you're caught up with the trick to this technique, try out this uber cool porous surface: Wood!

At the local Habitat for Humanity Restore we found a strip of poplar wood, 1/4 inch thick, four feet long and four inches wide. In reality it's measured, or described I guess, the same way as a two by four.

You know about those, I'm sure: A two by four isn't at all, it's actually more like an inch and a half by three and a half. Perfect to chop down for an ATC, luckily my poplar strip isn't any different.

Best of all, even if you slather it in crackle and ink and paint and goo, a thin business card magnet will hold it tight on a metal surface! Yay magnets!

And, yes, in case you're keeping a tally: This is another of the newest Compendium techniques that you can be sure I'll use again and again.

The joy of blogging

You're looking at one of those people who knows that occasionally blogging is a lot of work. An obligation that can feel stressful and sometimes, whisper this one, unrewarding.

Rescuing the commitment though is a kind comment from a reader or a chance to share an opinion that needed venting or, in the best times, the happy discovery that our small world truly is just that: A small world after all.

Those of us who blog about art, crafts or the stuff we found in the couch and glued to a cigar box (you know you've done it, too) see a lot of similar things.

We eventually find on nearly every creative blog familiar rubber stamp images, embellishments sold anywhere you can buy string (string!), and easy, years-old techniques.

Some days though a real treasure pops up and that's what keeps us going: The knowledge that one day we'll find an amazing new technique, discover a budding blogger artist or click on the photo of a Vintage-style tag, then lean in close to the monitor and exclaim "That's the same earring I have!"

My moment came in January while I was checking out this post by Mrs. A at It's an Alien Life.

She made a gorgeous tag, didn't she? And can you see that amazing, glitzy embellishment on the upper left hand corner? The one that used to be an earring (and technically still is since the clip is still attached).

Yeah, when I saw that I zoomed in, ran for my box of homemade necklace charms and tada! I had the same earring! But I'd re-purposed mine as a charm on a chain in my jewelry box!

Surprised at this odd coincidence that is even stranger since our Mrs. A lives in the UK and I'm up here in Northern Nevada, USA, I commented on her tag, exclaiming my discovery.

And because she's one of those super special bloggers who entice you to keep going even on the days that it feels like a lot of work: She sent the tag to me!

Mrs. A, or Valery as she's also known, has an interesting addition to this story, too!

Drop by her blog and ask how the earring arrived in her artistic hands.

Then take a soothing breath and forge on with your blog, the time and dedication pays off in fun and friendship: The best compensation in the world.


Tuesday, May 8, 2012

CC2C No. 4: Faded layers

Challenge: The StudioL3 Compendium of Curiosities volume II Challenge, technique 4

Technique: Faded Layers, page 43

Main products used for this project: Manila tag and ATC, various rubber stamps, floret mini mask, distress inks in multiple colors, and archival ink in black.

Project observations: The Faded Layers technique is wonderful because it's so easy to create a very unique piece of art!

Just drop in at StudioL3 to check out what everyone has been doing with this simple technique!

Obviously you can see that I'm not posting finished pieces, but it has nothing to do with the technique: Unless someone out there who wants lots of random art stuff is going to pay me really well with a reasonable amount of vacation time and excellent benefits ... my job is sometimes going to take the priority.

And other times just hanging out enjoying a Spring evening with a cocktail wins the top spot.

Getting back to the point: My intention for now is to add some elements including sea shells, dried flowers and ribbon. However I probably won't have time to glue and dry and photograph and post between now and the deadline on Thursday evening.

Are you wondering what will be keeping me so busy?

Well, for one thing, I'll be in town trying to find the three ingredients Linda has mentioned might come in handy very soon ... and some archival ink in a color other than black, which would have been unbelievably useful on this project ...

Or maybe I'll spend a few hours making some more Faded Layers because they are so beautiful!

Monday, May 7, 2012

Veering off the intended path

When I saw the white corrugated cardboard at The Funkie Junkie's Boutique on Etsy I couldn't wait to get some and play, play, play!

Then I saw a few other bits, including a die that's been making me drool forever and some wonderful rusty primitive stars and such.

Finished up the shopping cart and woohoo, a couple of days later I was standing at my work desk putting together the most gorgeous white corrugated tag with white fabric and white lace embellishments and a single rusty star. How pleased was I? Pleased people. Tickled freakin' pink.

Right up until my guy walked by, peeked his nose into my business and said "Wow, that looks like a wedding."

Weddings are definitely not my thing, but more importantly this creation was supposed to be chic, vintage, French sort of thing. Not a wedding tag. I don't even know anyone who is getting married.

This led to thoughts of color and texture and then zoom ... we now have a tag sprayed with color wash, embossed with vintage photo distress embossing powder, and pools of more lettuce color wash applied with a cotton ball that ended up leaving behind odd, wonderful bits of fuzz.

Because when I decide to switch gears I leave the road altogether, bumping along dirt paths and the occasional sidewalk.

Now I have a tag that I'm happy enough to have created, honestly it's not bad at all, plus this white corrugated board is such fun to work with ... but what the hell happened to chic, vintage and French? At least we've still got a little vintage.

My second attempt, just look ... it's yellow. Yellow! In what world is sunshine yellow also chic, vintage and French?

Does anyone know if the word "art" is derived from a French term? It's really my last hope to pretend that I can stick to an idea.

If you think of a way to make this mess chic and French let me know: In the meantime, please drop by the Frilly and Funkie blog to see what the Funkie Junkie and her team are creating!


Saturday, May 5, 2012

Art journal cover: Deadline entry

We're in a bit of a rush at my house, it's past bedtime and less than two hours to go to enter a cover for the eclectic Paperie journal blog hop.

Art journaling has long been of interest to me, but this is my first attempt. Technically what you see here is something like my fifth attempt.

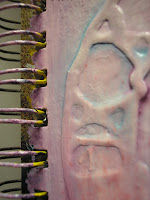
Because I started with bright white, moved into yellow and blue, then yellow with glow-glitter blue and so on until we arrived at this finished pinkish, lavenderish, whitish ... something.

I quite like it, especially the clockwork that was embedded into the very, very first layer: Gesso.

Despite being cut from aluminum and simply pressed into the gesso ... it's not moving around at all. Maybe that's due to the four or five layers of paint and ink on top.

Anyhow, we'll see how things roll with the actual journal. Hopefully the inside pages can stand up to layers and layers of indecision and "repair" art.

I hope everyone is enjoying a lovely weekend, complete with margaritas and unbelievably outrageous hats in honor of Kentucky Derby Day!